Putting Together a Limited Edition

Circus book cover

Before I head back into the studio to finish off this edition I thought it would be a good idea to show all the steps that go into putting it together. This is the finished book in a series of books based on my “weekly wait for food”. Every Sunday morning we go to a particular diner in our area and as soon as we arrive our waitress gives us coffee and our silverware wrapped up with a napkin in this napkin wrapper.

I carefully remove the wrapper and can only tear it into a shape based on that years’ theme. I do allow myself to use the knife, fork or spoon as tools but find that the fork is the best for giving texture and poking an eye into something.

The somewhat complex cover of the book for the diner series was discovered on an anthology of poetry book loaned by a friend. I liked how it folded and how both sides had to be printed exactly to get the windows to line up with an image. This appeals to an engineering side of me – making something fit.

I photographed the diner’s buffet table and interior so I could adjust them in a free photo application downloaded onto my computer. Microsoft Publisher helps with the layout of pages and design. The cover has to be printed on my large Epson printer that will easily accommodate 11″ x 17″ card stock that will give me two covers inside and out when loaded properly.

This is the fifth year of making things out of the napkin wrappers while waiting for my food. The first year was insects. That was fun, making bugs in a diner. Below in an image of the center fold of that book with its own pop up insect.

Diner Time Books with pop up insects

The only text in the insect book is what our waitress says to us.

After insects came a year of garden guests, then sea creatures and then the circus. I did not do editions of garden guests or sea creatures. Well, not yet. I am tempted when I finish the circus book to go back to the sea creatures because I made a special one for my collector of these little artworks when his entire year of the sea creatures was lost with a six year old and the fire place. I made his one off book as compensation for his loss in a flag style book that sounded like waves washing in and out as the sea creatures moved back and forth. I can easily talk myself into doing an edition of twenty of that book. It too was fun. And of course fun is about all that comes from this work. It is expensive in ink and paper, let alone time. The insect book sold for $20 each and I gave away more than I sold. With the circus book I am raising the price to $35 and as of today have five spoken for.

Let me start by saying that each Sunday when I make the “object” out of the napkin wrapper it is photographed on my iphone and then the piece is given to my collector who is amazingly grateful to receive these bits of scrap paper torn into something. Once in a while he will brave an attempt at something himself with his own wrapper and seek a critique. He is also my first purchaser of a finished book. Naturally I enjoy his enthusiasm.

When we return from the diner, I re-size the photo and post it on facebook for those who are following Sandy Webster – Artist can see the latest in Napkin Wrapper work. When a year or 52 different pieces are finished I can start a new series and hopefully I have selected something that I can do 52 variations on that theme.

Here is how the circus book is being done step by step. To begin all photos have been re-sized to fit the pages and layout that must fit into the previously designed cover. They are saved carefully until the entire 52 images have been used and pages numbered.

Then the printing. Here it gets fussy with ink and expensive. I need several cartridges to start the project. In the case of the circus book, the paper is card stock like the cover. All paper from the same ream and all carefully loaded with the best side being printed on. Then it is to the board shear to trim pages to the exact size and begin assembling.

Pages being glued

This very handy glue dispenser from MicroMark makes this job so much easier as a very thin bead of glue is needed to overlap the pages by only one half inch. Pages must be kept straight along a line and squared up to each other. The whole book pages glued out is quite long and they easily fill the studio.

pages ready to be foldedPages on board shear

After the strips of pages are dried I begin the folding process. The circus book is an accordion style book that I want to be able to turn by pages or pull it completely away from the spine to give the feel of an active circus tent with lots going on at once.

pages being folded

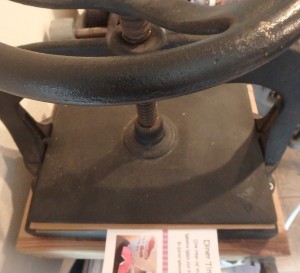
This again is precise work. Then the book is put briefly into the press to crease the spine folds tighter together.

book spine being pressed

Then it is time to make the cover fit the text block and cut the windows in the cover.

covers with text block

cover inside ready to be cut

All cut, trimmed, folded and sized.

cover folded to fit text block

Gluing in the text block and pop up ticket.

Circus book title page

Then finally fitting in the program to a T strap inside the back cover.

IMG_3073

There are more of the edition of twenty to finish off.

folded books piling up

Is all this work and materials being compensated for in the price of $35 each? Hardly. But I do find making them so much fun and that is worth something. I will likely quit making these books about the diner wait for food when I go back to do the year of sea creatures. I can’t think of much that will be as interesting as these three variations on the diner books. At present I am tearing out dogs and so many of them look alike. They are a bit of a come down from the circus and I have no idea what will be next. Maybe I will just start a ball of napkin wrappers just to see how large I can get it. The thought of just sitting there with that napkin wrapper and doing nothing with it is just not a good idea.

Wish me luck on selling more than five of these books!


Gifts

Treasure Boxes waxed and closed

Treasure Boxes Cane Toad side view

Marla's Gift Box with fabric scrap

These are three boxes I made for gifts this Christmas. The first one is pig skin over board with an inlay of goanna skin. The one below has an inlay of cane toad skin. And the last one is a box covered with a material that was turned into a book cloth and inlaid with a kantha stitched textile from India. They were treasure boxes filled with smaller wrapped gifts.

The cloth covered one was so much easier than the leather boxes to make. There is much to learn about how to make leather do what it needs to do to be properly fitted to the form. But I am learning.

The wooden spines have to be made first because all other parts must fit to that. Below are some of the stages the treasure boxes went through.

Here are the wooden spines with thick leather straps to give additional shape. The trays are made to fit and the ends covered with thin board to smooth out the join between wood and tray.

Treasure Boxes with trays attached

Next they are covered inside and out.

Treasure Boxes with inside bottom paper placed

The leather is cut to the correct size and pared down on the corners with a leather paring blade. In this case the cover boards will need to be made with windows to show the cane toad and goanna skins that are recessed into the cover.

Treasure Boxes layout for leather measurement

Treasure Boxes front cover window wrapped and weighted

The accent hides are centered onto the inner lid that fits into the box when closed.

Treasure Boxes Cane Toad inside

I used a tai kozo paper that had been contact printed with plants and a rust colored lokta paper on the inside of the boxes. The glue was pure corn starch paste for all except I used a straight PVA to glue the tray pieces together. These boxes were definitely a labor of love and I can easily see where I need to do better on the next ones. But I love how they sound when they close and how they feel in the hand.

Just Waiting

Xmas 2014 on the road

A week from today and it is Christmas. I finished wrapping gifts. Cards were sent out two weeks ago. Now I am remembering other Christmases with friends and family I will miss this year and wait for company to come and fill the spaces left behind.

A neighbor hangs these balls along the road each year. It is a lovely bit of unexpected cheer and we love it when one gets overlooked when they take them down and is left to remind us of the holidays all year long.

Our dinner for Christmas is all settled, ham, roasted sweet potato wedges, buttermilk biscuits, amazing kale salad, more vegetables followed by a presumably delicious dessert. Appetizers and festive drinks before we settle into full plates and even fuller conversations. It is a good grouping of family and friends old and new. I like mixing them up around the table so we aren’t sitting near someone we eat with daily.

There will be twelve of us which is smaller than usual so the menu is less complicated than before. I don’t think we eat as much food as we used to and that is a good thing.

What I also like is that we begin at four in the afternoon and easily finish by eight o’clock. We have caught up with each other and cleaned up by then. The only thing left is to put my feet up with a very chilled Stones Ginger Wine, talk about how well it all went and start thinking about what to do next year.

After Christmas I will post pictures of some of the gifts I made but for now they are to be a surprise.

Happy Holidays.

Travel Boxes

The Travelers Box lo res
image-1743

This past week I have been making very special boxes for gifts as well as finishing the last of my two travel boxes for other countries.  The one pictured above is not of my own travels but of an imaginary wanderer.

This is a box that opens in the middle on one side only. It sold several years ago out of an exhibition. The top left window holds this writing I did that inspired the work.

“Once he returned from his travels there was so much to sort through. Where to put it all – especially the memories. Which ones would they replace. What and who did he have to let go – what forgotten and what not.”

I think I was fascinated with the idea of whether there was a maximum of space to hold memories and did we make somewhat conscious choices to let some go just to hang onto others. How did we say goodbye and close the door on some and open it to others.

Anyway here is the inside of the Traveler’s Box. It is filled with the things placed in his pockets along the way and his journal full of already fading memories.

The Travelers Box open lo res
image-1744


The Travelers Journal open lo res
image-1745

This is one of those ideas that as an artist is just so rich, so full of potential for expression. It seems to recur over and over in my work.

I am glad that someone bought The Traveler’s Box. It makes an artist pleased that it mattered enough to someone to do that. But I would like go through his journal again and hope that somewhere in my files I have images of everyday he was recording, remembering and then forgetting all that he saw. I’ll have to look.

So back to this week. Since 2010 the mementos of France and Italy have been waiting for their boxes to be made. And here they are.

France.

Travel Box France
image-1746

Travel Box France inside
image-1747

Some of the shopping bags are folded in the bottom. A book of tied together pages of itinerary, tickets, wrappings and small papers is placed on top. Then a tray made that holds a small translation dictionary, lavender soaps and tea bags, buttons from a potter in Rustrel, a notebook from Sennelier and a baguette bag. The inside lid has another bags paper covering the insert.

All of my sketches from France and Italy are in a separate leather journal I made for the trip so no drawings are in these boxes.

Italy.

Travel Box Italy
image-1748

Travel Box Italy inside
image-1749

Italy is a much smaller box covered with the shopping bag a book binder used to hold purchases. Another journal of tied pages for tickets, etc. Wine corks and a small bundle of cards the book binder made still in their leather wrapping. In the inside lid is a pocket to hold prints purchased from street vendors and postcards.

These two boxes joined the other five on a shelf of contained memories of places not here.

Travel Boxes on shelf
image-1750

Below are pictures of those other boxes that hold Australia, Bali, China, Japan and New Zealand.

Australia is my first and fairly large box of mementos. I like the sketches hidden inside.

australia box sketches lo res
image-1751

Bali. I added the lotus from my water garden at home. There were so many of these everywhere in the gardens of Alam Jiwa near Ubud.

bali box open lo res
image-1752

China.

china box open
image-1753

china box sketchbook lo res
image-1754

Japan.

japan box open lo res
image-1755

japan box displayed lo res
image-1756

New Zealand.

new zealand inside lo res
image-1757

It occurred to me that I have been to an eighth country – Canada – and only did sketches while there. Such a close neighbor; I never really saw it as a foreign place. Maybe some other time.

Next year back to Australia and maybe someplace new.