I found these little fellows while clearing out the storage area. There is a whole lot of boxes of things that will see the burn pile soon but not these. I will find a good home for them somewhere. These were made in the mid 80s after learning how to do them from a long gone Japanese basket maker named, Theresa Ohno. She was a friend and I believe neighbor of Grace Kabel, also gone, who single-handedly brought back basket making skills to the masses by way of research into techniques, using a material new to the market as an off shoot of the rattan furniture business, and then teaching a few of us who would go on to teach others, who taught others, who taught others….
Grace Kabel wrote many hand produced books and several of us were her testers for how the instructions were written. I often got side tracked and was not a good tester. When we would meet up the next month, I would always show a less than perfect basket with inevitable variations in the materials like some wonky grapevine handle instead of the well-formed and well-instructed handle that was supposed to be there.
Anyway…..here are some other pictures of basket forms done about the same time.

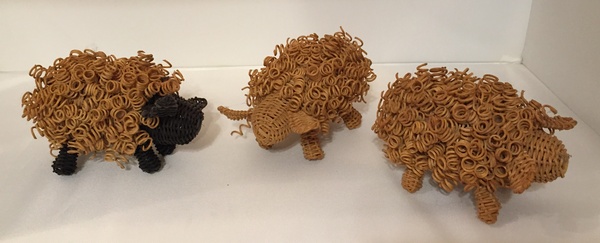
My own variation on Theresa’s sheep and a candlestick. Was I really thinking of putting an open flame into it! Really dumb idea.

Because I was a loom weaver at the same time back then, I made many, many sheep.

Grace also introduced me to this technique. She taught it in the making of handbags with large materials but I only had bits of loom weaving pearled cottons. And always a bit of glitz, beads and a cord so you could wear it around your neck. Dianne Itten and Jane Sauer took this way of working to extreme heights followed by many others. I think its appeal was the individuality it afforded the maker. Lots of material and form choices. There were really no limits.
Hence my manatee.

I am quite sure I did not have “manatee” in mind when I shaped the nose over a cardboard yarn cone, but once pulled off and flattened, I could see it plain as day!

And the small arrow quiver shaped over a wooden spoon handle and a piece titled, “Rainy Nights” complete with shiny rain drops, clouds and a moon above – shaped on the yarn cone again. I actually taught this to students by taking my cones, nylon cords (that were used in the upholstery trade) and of course beads. It makes me smile when I think of all the time it took to make these and then have people ask, “What do you do with it?”
More teaching of small useless things with the materials of loom weaving.

There was not much I did not put a stick on or in. And that led to my taking on the idea of teaching “Basketry on the Loom”. I was obsessed with taking an early loom weaving pattern book, Margarite Davidson’s for sinking sheds and adapting the patterns into basket forms. Some I numbered the spokes with a harness number and wove around the basket as though I was throwing a shuttle back and forth. Each time I came around to the marked beginning, I would change the “shed” to the next pattern shot. Anyway I was asked to write an article on it for a weaving magazine based out in Colorado. Here is the black and white copies that I gave students who signed up for the classes and help make a complete mess in weaving studios.

I also taught coiling over reeds with raffia.
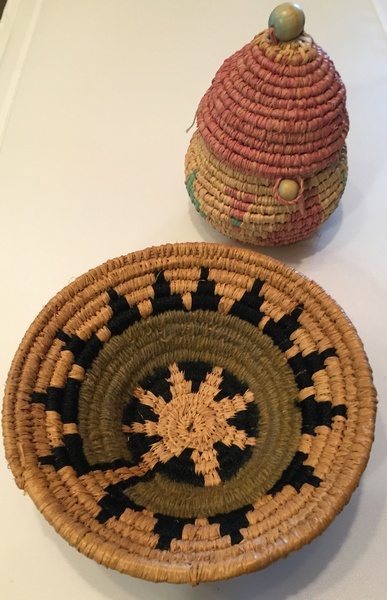
Notice the black and green wool yarn from my loom weaving stash. I never could just do things “right”. And what was I trying to picture on that tall-lidded container? Good grief!
But because someone asked about the sheep and how they were done, I am going to show that one picture at a time.
First the body. Four spokes of a number 1 rattan reed are cut to about 10 to 12 inches crossing two over two in the center for the beginning of the nose of the sheep.
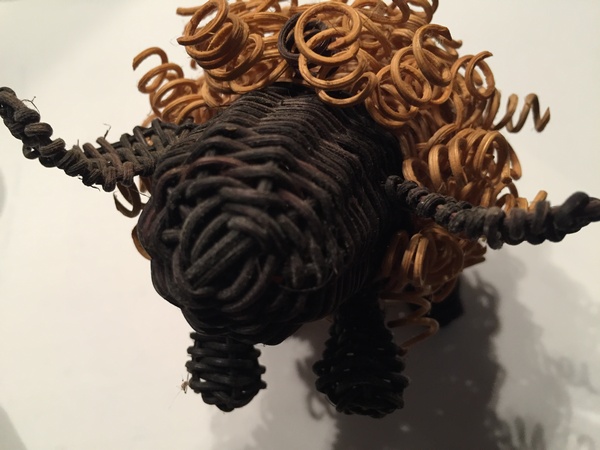
Next a weaver pinched near the center is folded around a set of two spokes and twines around each other set of two for a couple of rows before being twined by singles. Start shaping the face quickly keeping the hands outside of the “basket.” And here I made the spokes of dyed black material and also the weaver for the head part. This is optional.
Weave the fellow in the shape of a sheep by increasing the distance between spokes to form his fat form and finish by poking the spokes inside his body.
Set that part aside and do the two ears.
Pretty simple to see that it is one curved spoke to make two and the one end of the weaver goes down the center of the ear so its other end can weave over and under the three spokes as the ear is shaped.
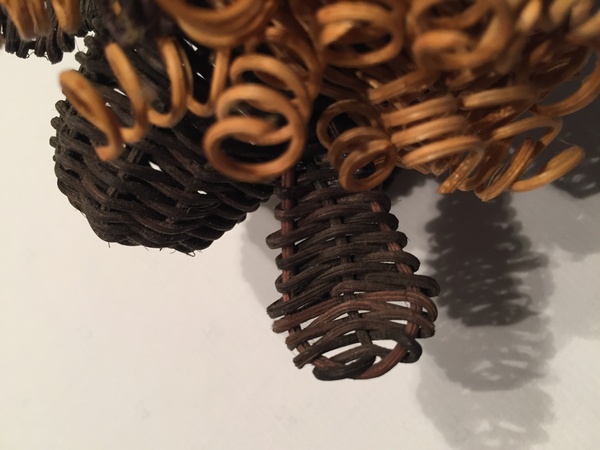
Feet.
Just two spokes crossing in the center and the weaver’s end making the fifth spoke so you can continue to weave from the bottom up around the odd number necessary to use only one weaver. Sort of like the ears. Make four of these leaving the spokes sticking out.
Now stick the ears in and the legs into the body.
Curls are easy. They are made using wet number 0 rattan reed that has been wrapped and dried around a pencil. Just cut them into small pieces and screw them into the body.
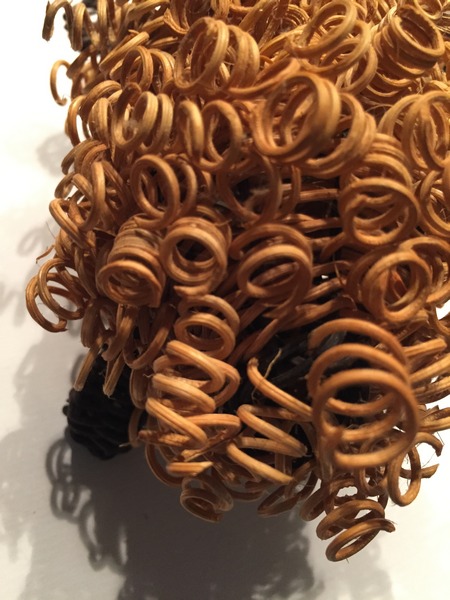
His body spokes have been finished off inside the body at his rear end. It is easy to cover all of this with the curls.
It might take making a few of these before getting the feel of it. Remember to keep all the weaving materials damp so they are pliable.
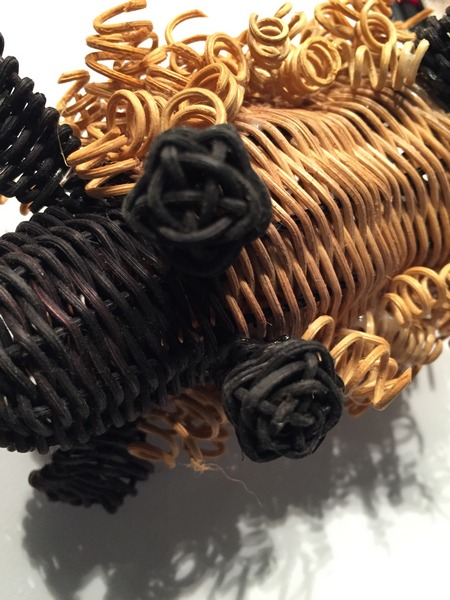
Now here is close up of the modified sheep I made. You can figure out how it is done just by looking.
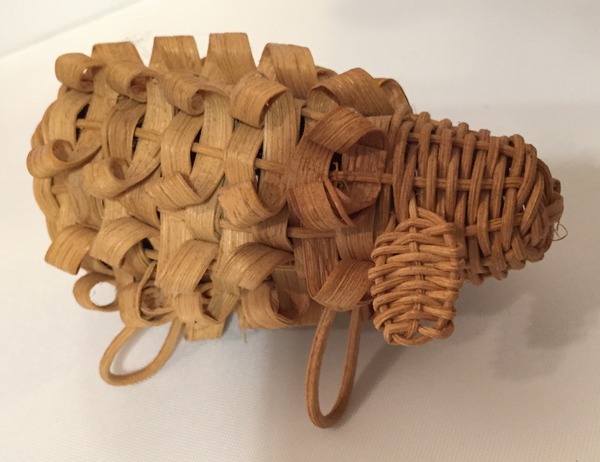
Flat reed of 1/4 inch is used to weave the “body” after the head is woven and just loops of reed are used for his legs. His curls are another 1/4 inch weaver curling back and forth as it goes over each individually woven band beneath it.
This was fun. Now off to the burn pile.
Til next time.